The Ultimate Guide to the Perfect Senior Parking Spot
Senior year is an exciting time, and many schools are kicking things off with a fun activity for high school seniors, a DIY Senior Parking Spot.
If you have a senior this year, you’re probably trying to figure out an approach to parking spot painting, after experiencing it myself and realizing that online resources for senior parking spots are nearly non-existent, and how it can quickly start to feel overwhelming.
Today, I’ll show you an easy way to approach this and still end up with a gorgeous senior parking spot that will last all year long!
This post may contain affiliate links for your shopping convenience, this is at no extra cost to you. For information see my disclosures here.
Project Breakdown:
Secret Weapon: The ONE thing that would make this project super easy would be stencils in your design of choice… Just one problem.
Unless you have stencils custom-made, the likelihood of a store having anything big enough or in your specific design is slim. But I’m going to show you how to make custom stencils quickly using your design of choice and Staples Laminated blueprints.
Choose Design:

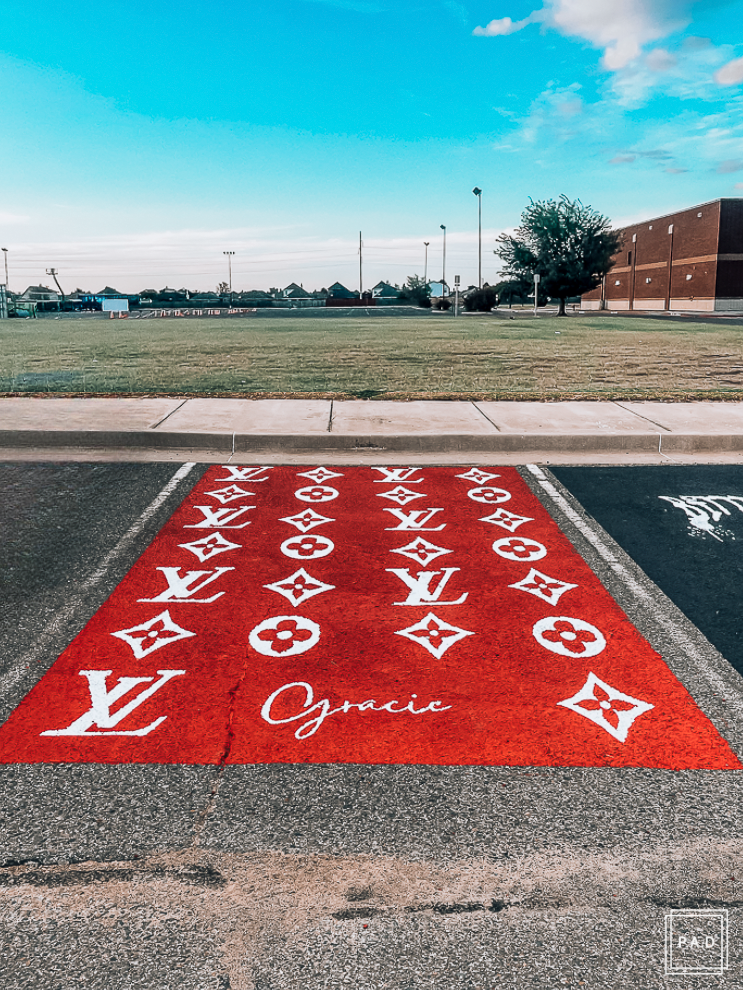
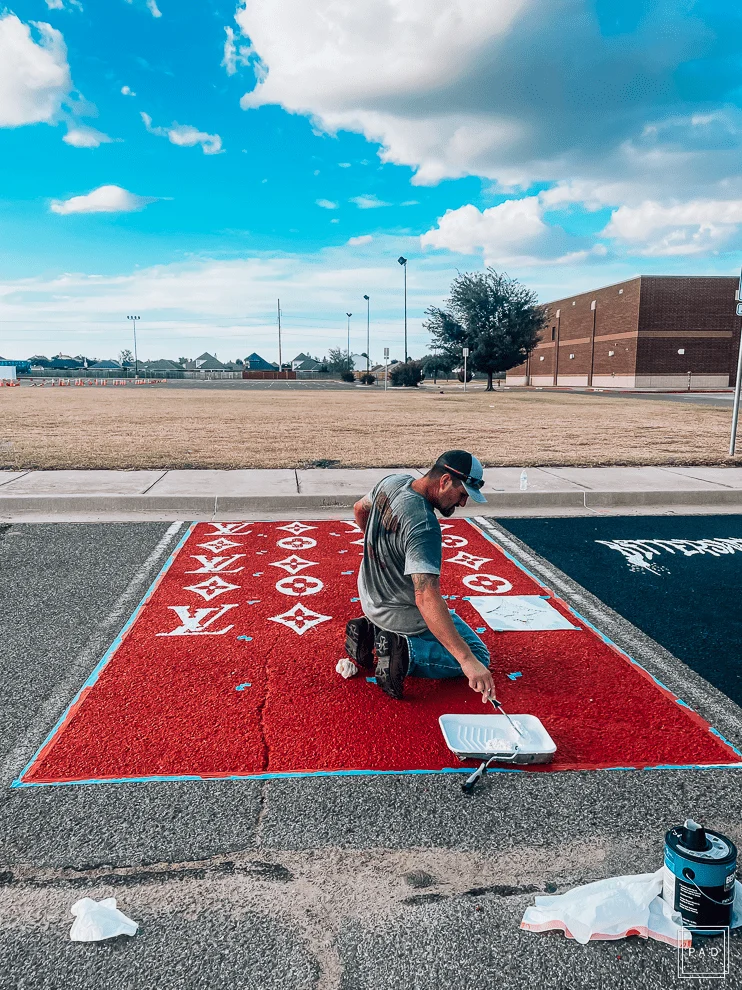
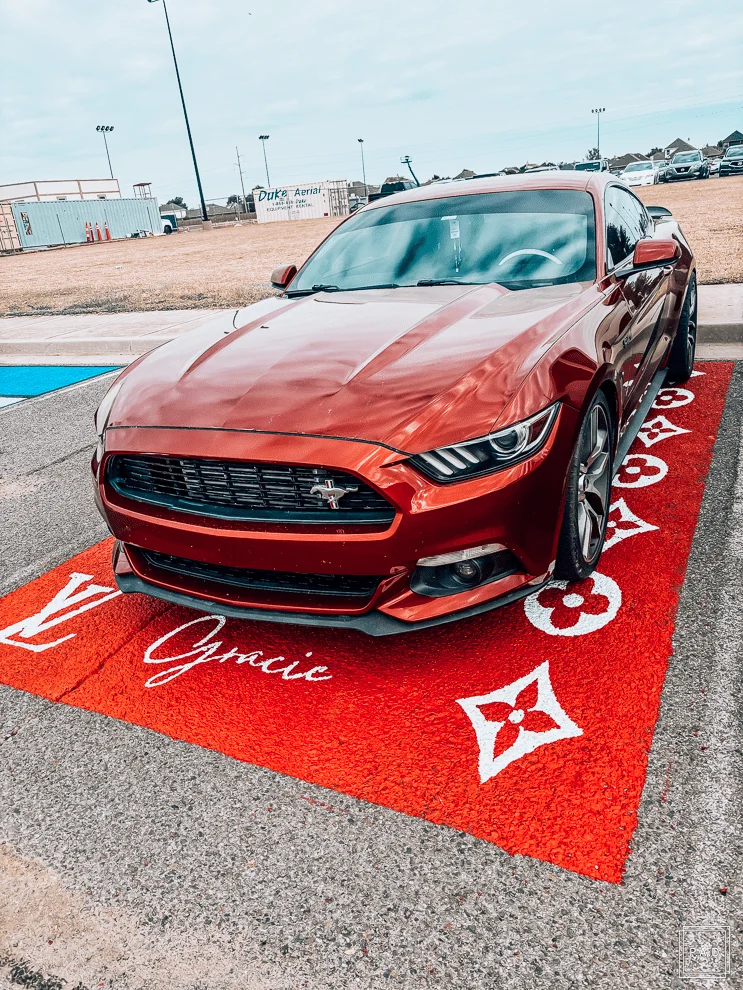
Our senior wanted the signature Louis Vuitton-inspired pattern, so I ran a Google search for the pattern, and we were able to find the look she wanted. Then, we brainstormed color ideas. The pink is great, but we wanted the color to complement her car, and since she would be looking at it all year, we opted for ruby red and a creamy white.
Creating blueprints
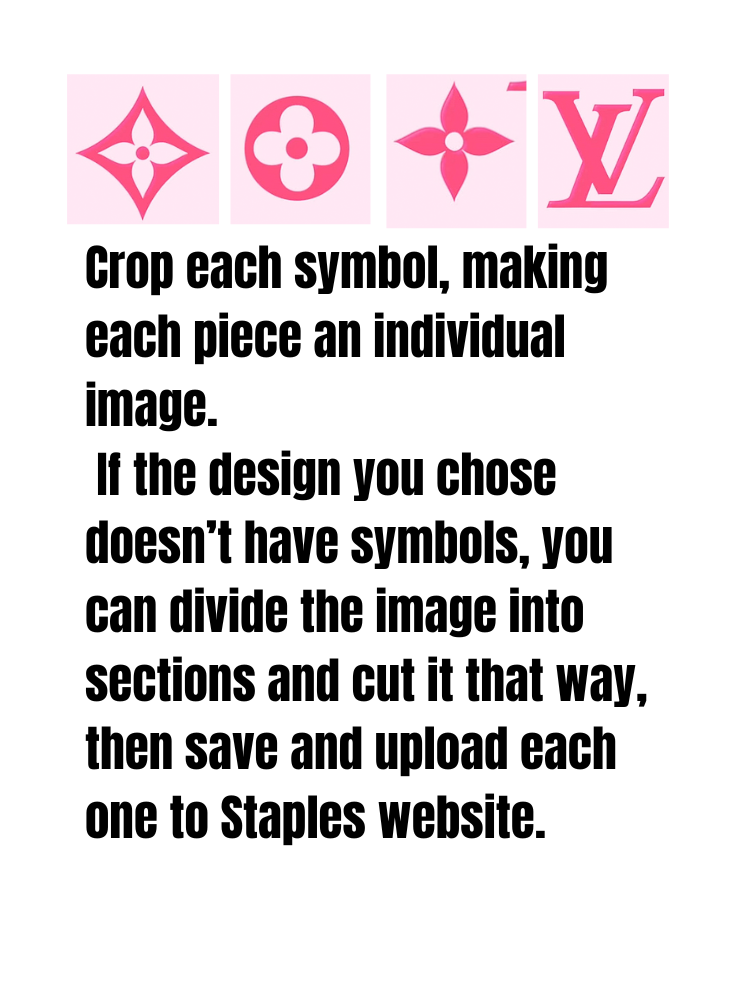
Once the pattern/design is chosen, save the image, crop each symbol, and save each symbol as an individual image.
Ultimately, we were left with four different shapes that we uploaded to Staples’ website. There, I was able to enlarge the photos and choose the size of each symbol. To fill as much space as possible, we went with 36×48 blueprint paper and added lamination. Lamination is important for any item that will be used repeatedly, as opposed to the name, which will only be used once.
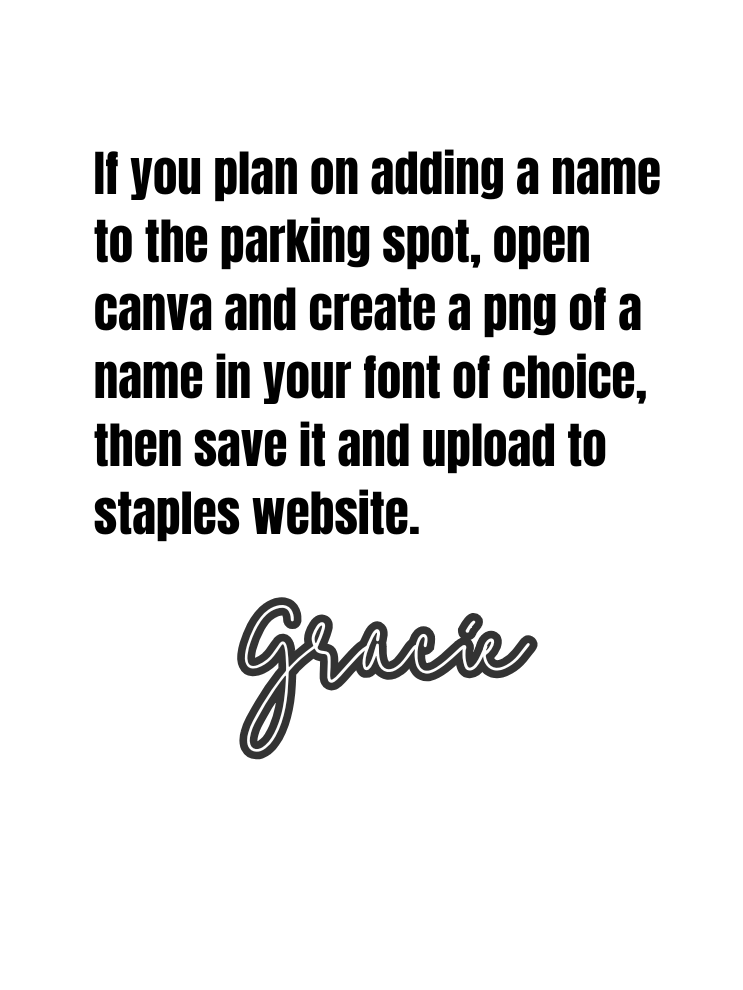
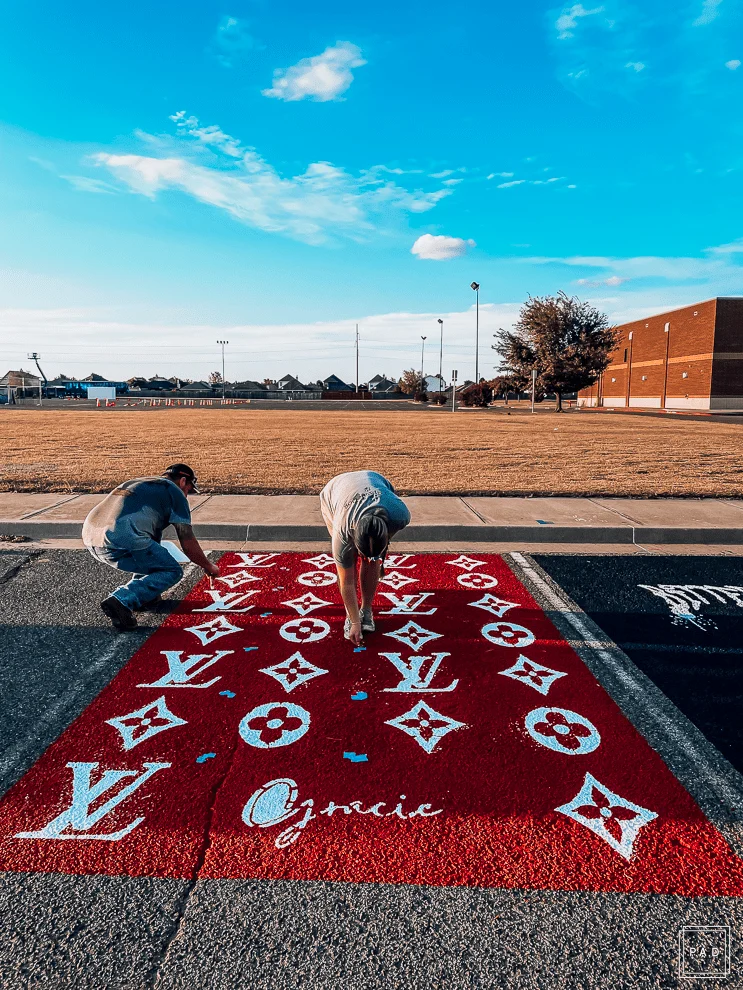
Create Name Tag:
Go into Canva and create an image of the senior’s name in a font of your choice and upload it to Staples’ website, and since this one wouldn’t have to be used multiple times, we didn’t laminate it and just hoped for the best! (It came out fine)
Typically, these can be made the same day, but give yourself a little extra time just in case.
When we went to the store to pick up the stencils, we purchased an Exacto knife (I already had a cutting mat at home, so either use a cutting mat or something you don’t mind being cut.
Then the fun began!
Wayne used painter’s tape to tape the blueprints to the cutting mat and then used the Exacto knife to cut out the outline of each symbol. Be precise, otherwise the design may not turn out. This part took an hour, so depending on how many symbols you have, it could take longer.
We then needed to grab our paint colors for the design, so we headed to Home Depot. Her car is ruby red, and we are Oklahoma Sooner fans, so we chose the iconic crimson and cream, and Behr happened to have a lot of new options due to their latest designer collection, so we chose these colors below.
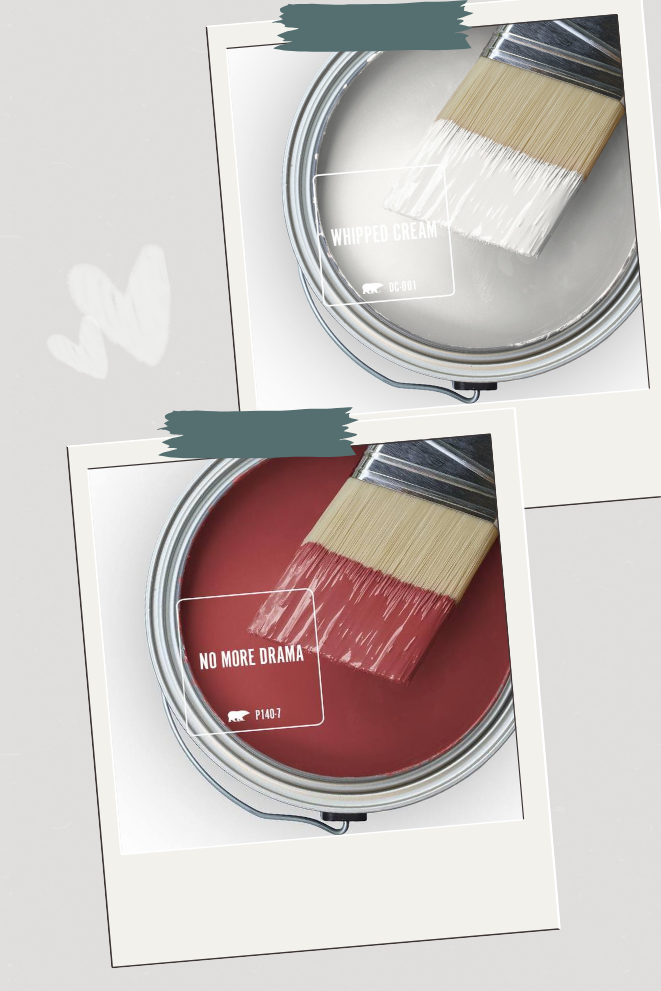
Behr No More Drama and Behr Whipped Cream
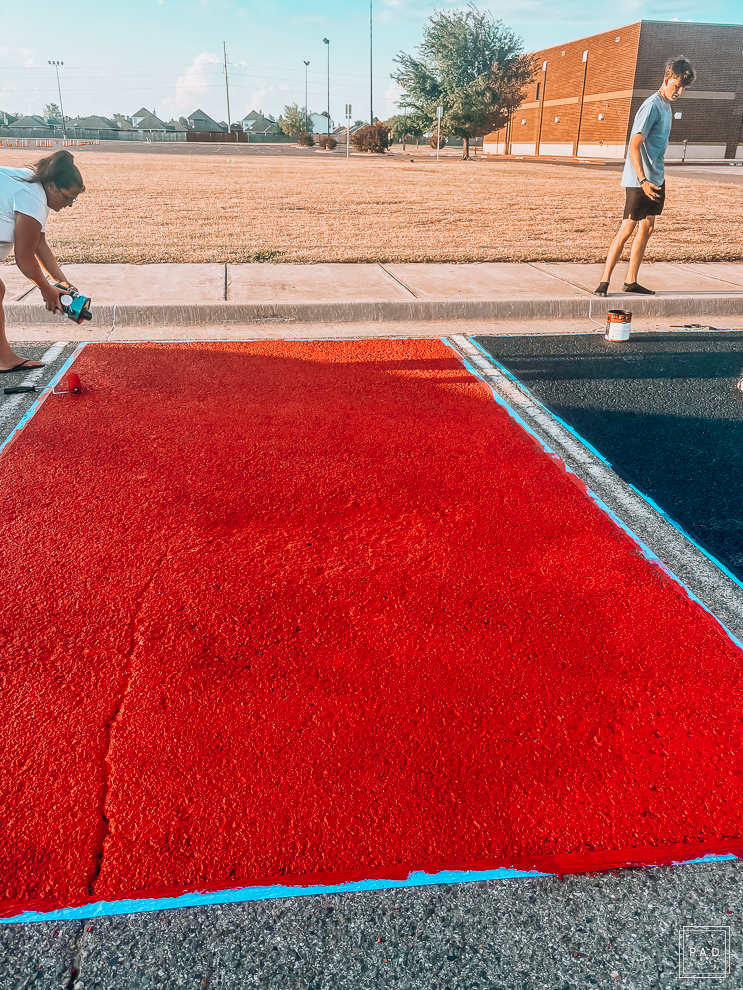
- Tape off and paint the background color
Take the size of your stencil and divide the parking spot by the number of symbols you have, to see how many will fit inside the space. You may have to add inches between the symbols to fill it up, but take a small piece of painters’ tape and mark each spot, working in a grid. This will help to keep everything straight
When you come to that spot, you will use the painters’ tape to line up the stencil and hold it in place while you paint.
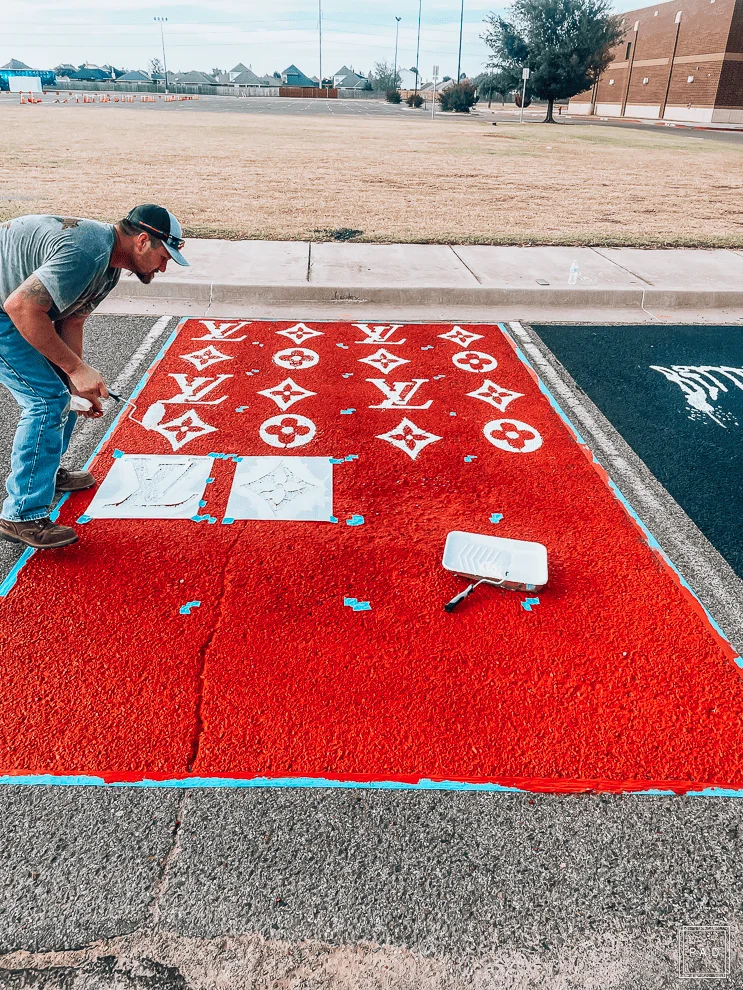
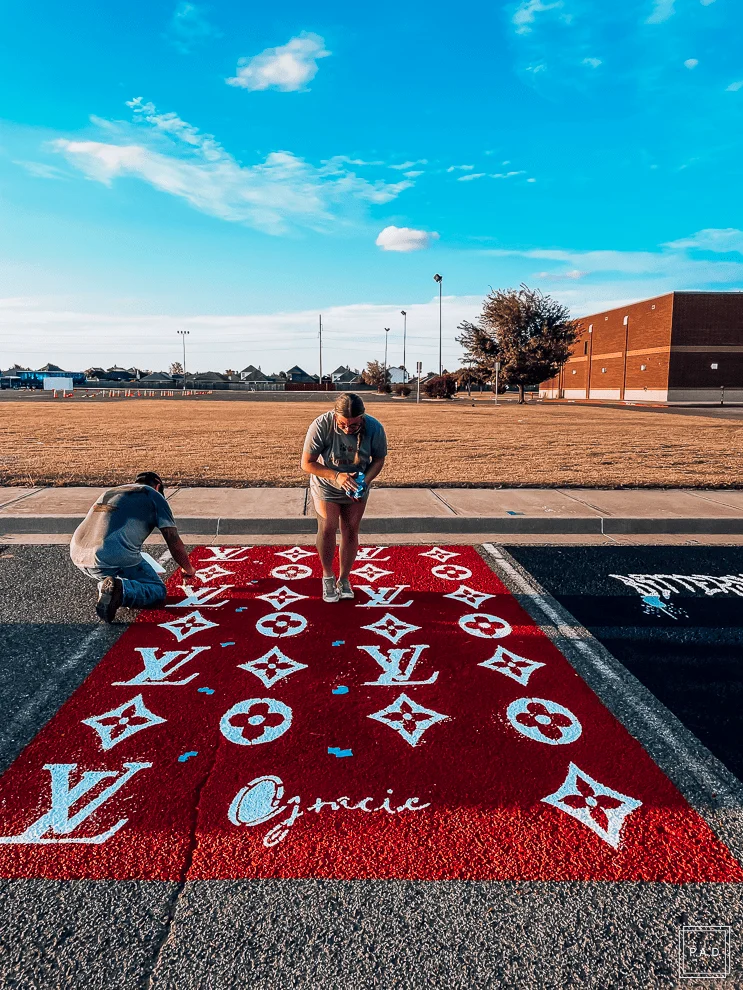
When you finish, you will see a lot of spots where the symbol color got onto the background. Don’t worry, you can touch all of this up once it dries.
Hope you enjoyed this post and it helped to make your senior parking spot painting easier. Don’t forget to pin 🙂


Leave a Reply